January 6, 2022
English
Japanese

NIPPON GENE CO.,LTD.
Micropipette operation guide
Micropipette operation guide
A micropipette that can accurately handle very small volumes of liquid is an essential tool for genetic testing. Let’s learn basic operations, points, and precautions for handling micropipettes for those who have never used them or who are less familiar with them.
- What is a micropipette?
- Micropipette parts and structure
- How to adjust the volume and basic operations
- Attaching the tip
- How to aspirating the liquid
- How to dispensing the liquid
- Storage and Maintenance
- Conclusion
1 What is a micropipette?
A micropipette is an instrument for accurately measuring a small amount of liquid. To accurately measure large volumes (e.g., 1 L) of liquid, a measuring cylinder is used, but the micropipette is an instrument that is useful in a microliter (less than 1 mL) world.
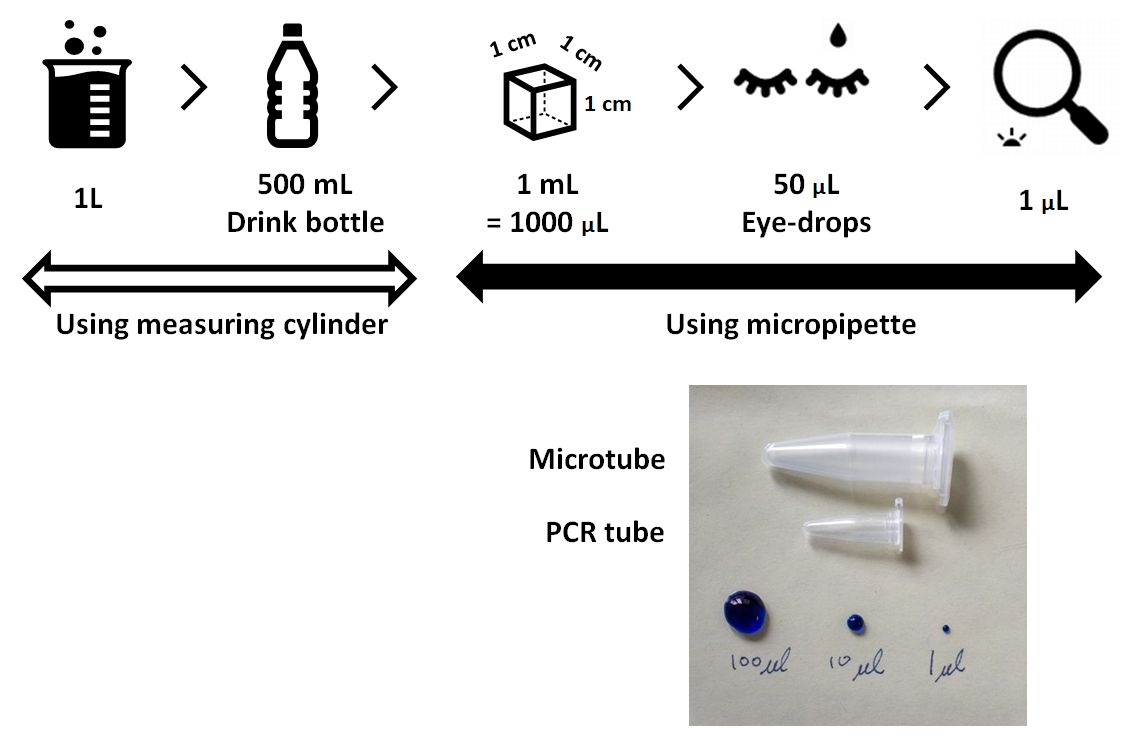
The effect of error is greater when the total volume of liquid handled is smaller. For example, if you put a drop of ink in 1L water, it will dilute and hardly change the color, but if you put a drop of ink in 1 mL of water, the color will change greatly. The world of genetic testing deals with very small amount of liquid. Therefore, a micropipette that can accurately measure them is very important.
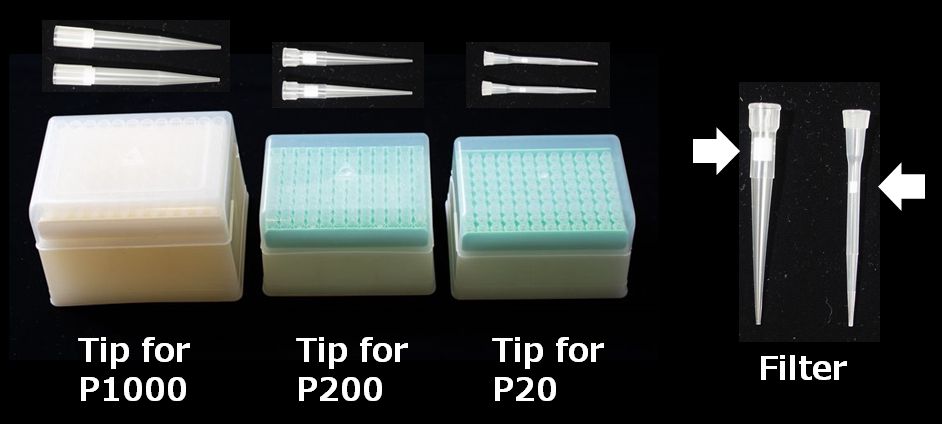
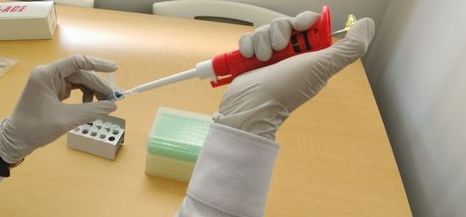
Genetic testing requires transferring the solution to another container or mixing the liquid with another liquid repeatedly. The micropipette is designed to be used continuously by attaching a disposal pipette tip and replacing it once used. Therefore, it can be used quickly and repeatedly without washing.
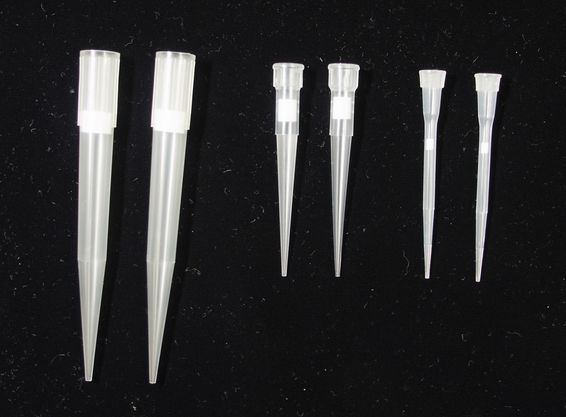
Tip for P1000 (left), P200 (center), P20 (right)
Thus, a micropipette is very convenient for handling a small amount of liquid, but it may break down or the intended amount may not be measured if it is not used correctly. So remember the correct operation here which is not so difficult, and allow you to perform genetic testing on your own.
Icons:
 caution: This indicates things that could lead to a micropipette failure or a failure of the test
 point: This indicates techniques and advice for performing tests well
2 Micropipette parts and structure
First, we will explain the parts of the micropipette, using the “Genetic Testing Toolbox” which we offer as our product.
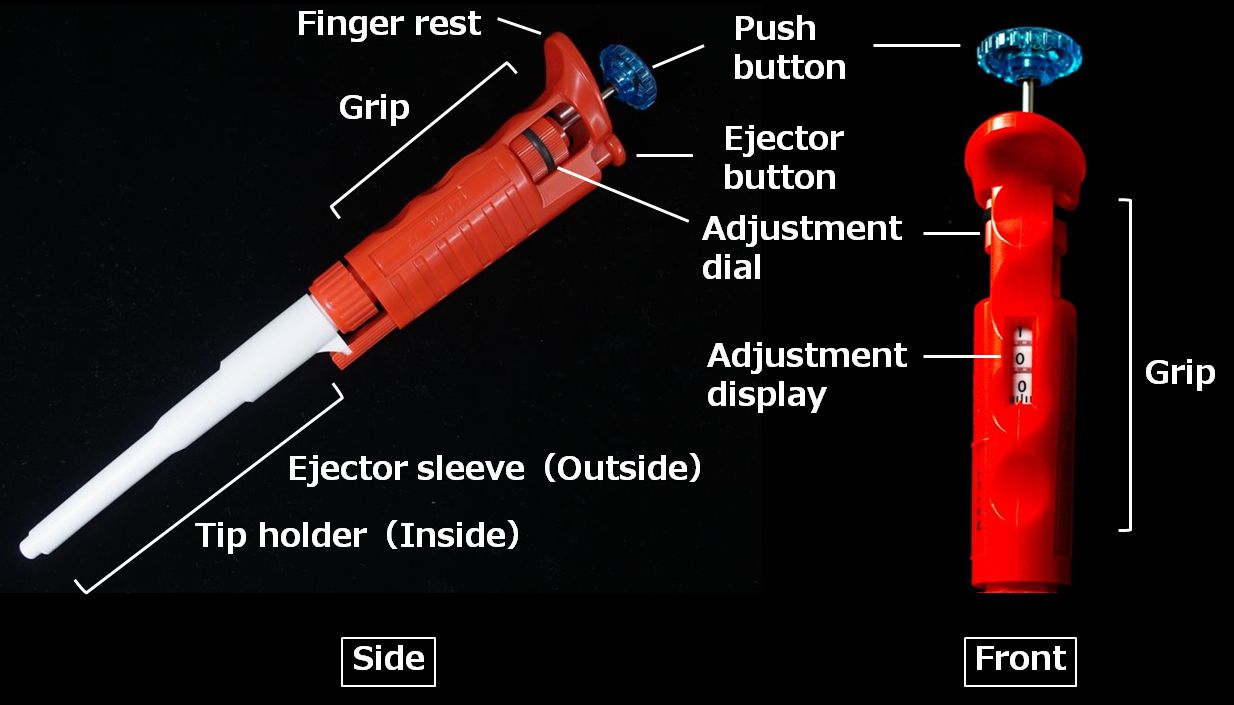
For the flow, you can start with winding the adjustment dial to set the desired value, then grasp the grip with your dominant hand and place your thumb on the push button. After attaching the tip to the tip holder, aspirate and dispense the solution by operating the push button. The ejector button is pressed when removing the tip.

The micropipette operates by moving the piston through a push button to displace air which aspirate and discharge liquid (called air displacement system). Moving of the piston is kept airtight inside by a rubber ring called O-ring. In addition, since there is a spring inside, pressing the push button activates the force to return to the initial position.
Place your hand spontaneously with the finger rest applied to the index finger side, and thumb over the top of the push button allowing to push. If too much force is applied, the push button cannot be moved smoothly, so the shoulder and wrist should be relaxed and allowed to move freely.
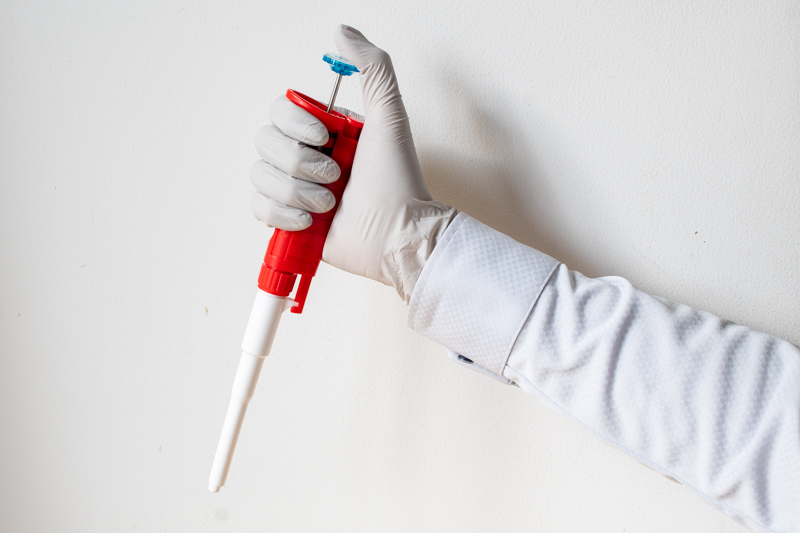
point: How to stabilize a pipette
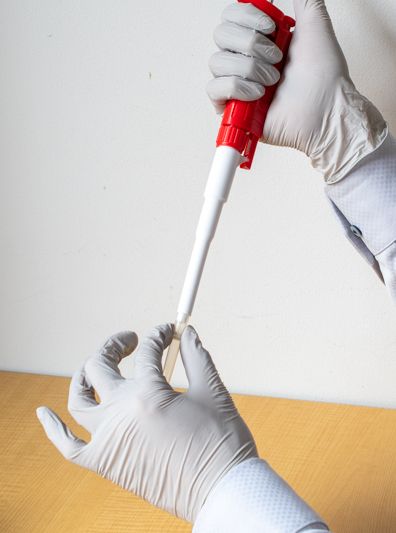
If your hands shake during the operation, place your elbow on a desk and stabilize it. The tip is stabilized by attaching the other hand to the tip holder. However, take care not to contaminate the tip with the attached hand. Be sure to touch the micropipette in a clean condition, such as washing your hands and gloving before working.
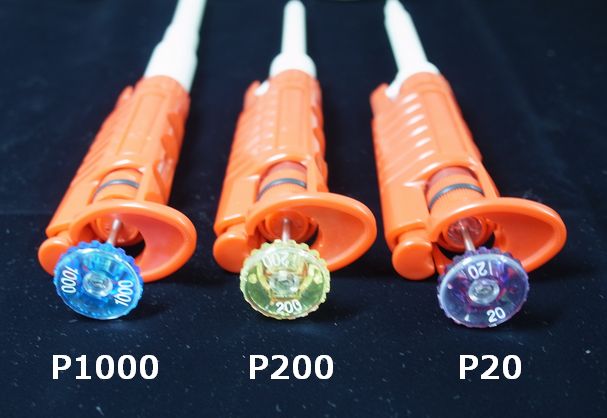
There are three micropipettes commonly used: P1000 for 200-1000 μL, P200 for 20-200 μL, and P20 for 2-20 μL. Generally, the maximum volume is listed at the top of the push button, so it is good to check it first.
| Name | P1000 | P200 | P20 |
|---|---|---|---|
| Max (μL) | 1000 | 200 | 20 |
| Min (μL) | 200 | 20 | 2 |
caution: Use according to the maximum and minimum aspirating volumes
Check the pipette capacity and make sure that you use the appropriate micropipette. Use of a micropipette at volumes outside the range does not assure precision and may lead to failure, such as aspirating solutions inside. The acceptance ranges may vary depending on the manufacturer, and should be checked on instruction manual, etc.
Micropipettes are marketed by several manufacturers and may differ slightly about its operation. For example, if a micropipette has a locking mechanism on the adjustment dial, unlock it and adjust the scale, and then lock it again. However, the basic principles and handling are the same, so if you familiar with the pipette you commonly used, you would not confuse regardless of different manufacturers.
3 How to adjust the volume and basic operations
Adjust the volume by winding the adjustment dial. In the micropipette described here, three numbers are aligned vertically, the number at the top represents the maximum capacity of the micropipette. In other words, for P1000, the maximum volume is 1000 μL, so the first top digit is thousands of uL; for P200, the maximum volume is 200 μL, so top digit is hundreds; and for P20, top digit is tens. The second and third numbers represent the position 1/10 and 1/100 of the first. In addition, the lower part of the scale is adjusted on the scale marked below the third number. Note that the step of the scale changes according to the maximum volume of the micropipette.
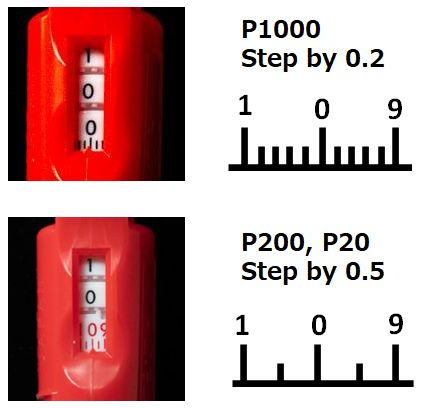
*The coloring of the digit at the bottom of P20 is red, which represents the nanoliter range that is even smaller than the microliter range.
To aspirate the specified amount of liquid, the push button is used, there are two stopping positions when pushing down. The 1st stop and the 2nd stop, respectively, and until the 1st stop, the push button moves lightly, then becomes heavy to push from there to the 2nd stop. Understand their role to master the micropipettor handling.
From the initial position to the 1st stop
> The volume of air is pushed out by the volume set on the adjustment dial.
From 1st stop to 2nd stop (used for dispensing)
> A little more air is pushed out from the set amount (to prevent tip residue).

4 Attaching the tip
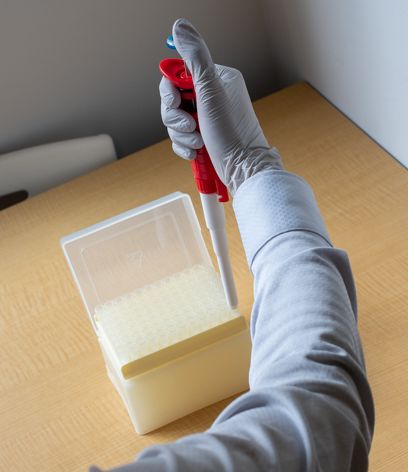
Choose the appropriate tip depending on the volume. As described earlier, the solution is aspirated through the air displacement, so if air leaks, accurate measuring is not possible. So if the tip is not tightly attached, the internal tightness cannot be maintained, causing leakage of the liquid. Ensure that the appropriate tip is attached to the pipette you are using. Since the tip must be kept clean, attach it directly from the tip case. Open the tip-case lid and push on the apical of tip holder against the tip. Some tips have a filter inside. The filter prevents the aerosol from entering the micropipette.
caution: If the solution is aspirated into the micropipette
Even if a filter is attached to the tip, the solution may get inside of the micropipette. In that case, remove the tip and point the apical of tip holder toward tissue paper or a dry, clean cloth and pat to remove the solution. If the entered solution remains inside, the internal O-ring (rubber) to maintain air tightness may deteriorate. In addition, if the stain is severe, ask the manufacturer to maintain it.
caution: Handle the apical of micropipette with care
Do not slam the apical of the tip holder strongly against the tip case when attaching the tip. The micropipette is kept accurate by internal air tightness, so beware scratches or cracks at the apical of the tip holder which might cause breaking the air tightness.
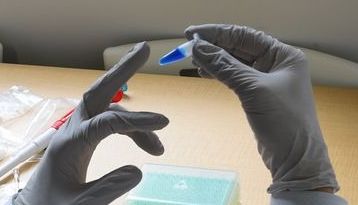
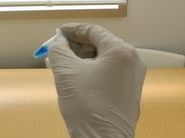
caution: Notes when attaching and detaching the tip by hand
When an ejector is not installed on your micropipette, you should remove tips by your hand. In this case, only touch the root of the tip and do not touch the pointed end of the tip.
5 How to aspirating the liquid
To aspirate the amount of the adjusted scale, dip the tip into the liquid with pressing the push button to the 1st stop, then slowly return the push button to the initial position. The solution will be aspirated into the tip. After complete aspirating, withdraw the tip from the liquid surface. Move quickly to the receiving container or to the solution you want to mix, then dispense the liquid.

See gif; Aspiration (opens in a new window)
Let’s break down the aspirating procedure more minutely and give some points to be noted.
5-1 Pre-work preparation
Point: Imagine the whole process
Once you aspirate the solution, you cannot take your hands off from micropipette until it is dispensed. When handling a container with a lid and you are not used to, it will be better to open the lid before holding the pipette and then perform the aspiration.
Consider the flow of the micropipette movement, from attaching to discarding the tip, and arrange the position of the tip case, sample, dispense container, tip discard, etc. so that the hand moves smoothly. The knack of performing the test successfully is that the hand does not go back and forth over the sample, but does it through one-way flow.
5-2 After setting the volume of liquid to be aspirated, press down the push button to the 1st stop
caution: Push down till to the 1st stop
Do not push down the push button to the 2nd stop when aspirating. If you push down the button to the 2nd stop and aspirate, the liquid will be aspirated to an extra amount for extrusion, so it will be more than the volume you set.
5-3 Dip the tip into solution and perform pre-wetting
point: About pre-wetting
Liquids, like water and oil for example, have different properties depending on the type. You can increase the accuracy of pipetting by performing the operation of aspirating and dispensing in the solution before starting the aspiration process, in order to blend the inside of the tip with the solution in advance. This operation is called pre-wetting.
Point: Do not make bubble
Always push down the push button to the 1st stop before dipping a tip to the liquid level. If a tip is dipped on the liquid and a push button is pressed, the air inside is extruded and bubbles enter the solution. Especially for protein-containing solutions that are prone to bubbling, the inclusion of bubbles may make it difficult to obtain the exact volume or reduce the original function.
5-4 Slowly return the push button to the initial position (aspiration)
point: During aspiration, keep the tip in the solution
The more solution is aspirate into the tip, the lower the liquid level will be, so be careful not to expose the tip out of the liquid level while aspirating. Although it depends on the shape of the container, please note that the liquid level drops quickly when the total volume of the solution is small. If bubbles get inside the tip, the correct amount of solution you set is not aspirated, so return the solution to the source and aspirate again.
caution: Don’t return the push button too quickly
If the push button is abruptly returned during aspiration, the inside of the micropipette may be depressurized suddenly, causing the liquid splash. A filter tip will prevent liquid to get inside, but the filter will get the liquid and will not be able to measure the exact amount, so replace the tip and try again.
5-5 Draw the tip from the solution
point: About droplets on the outside of the tip
If there are droplets on the outside of the tip, it will be extra amount. Remove it well with the edge of the container.
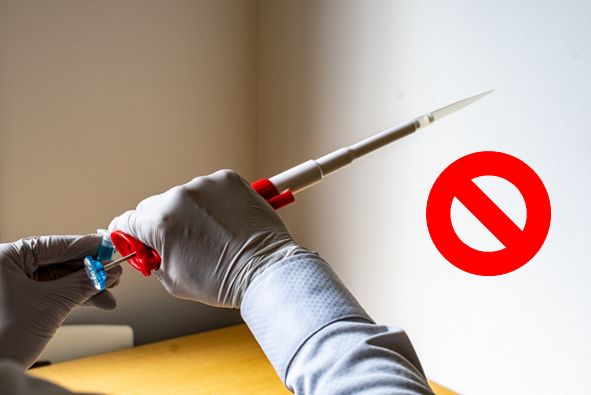
caution: Do not point the tip up
After aspirating the liquid into the tip, make sure the tip of the micropipette is always pointing downward. If the tip of the pipette is pointing upward, the aspirated solution may get inside the micropipette. For example, be careful when opening and closing the lid of the container when holding a micropipette.
6 How to dispensing the liquid
Liquid aspirated into the tip is dispensed by pressing the push button to the 1st stop. Then by pressing to the 2nd stop, the liquid will be discharged completely from the tip. To make the concentration uniform, mix well after dispensing.
See gif; Dispensing and mixing by pipetting (opens in a new window)
Let’s also break down the sequence of events for dispensing and list some things to keep in mind.
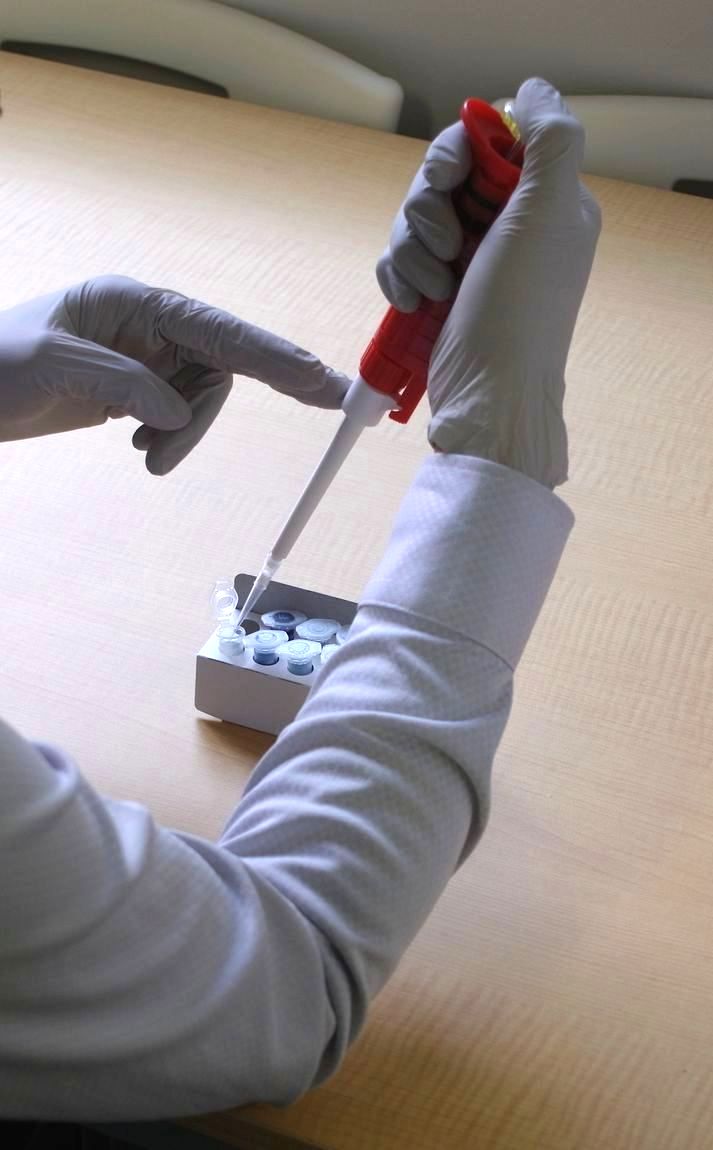
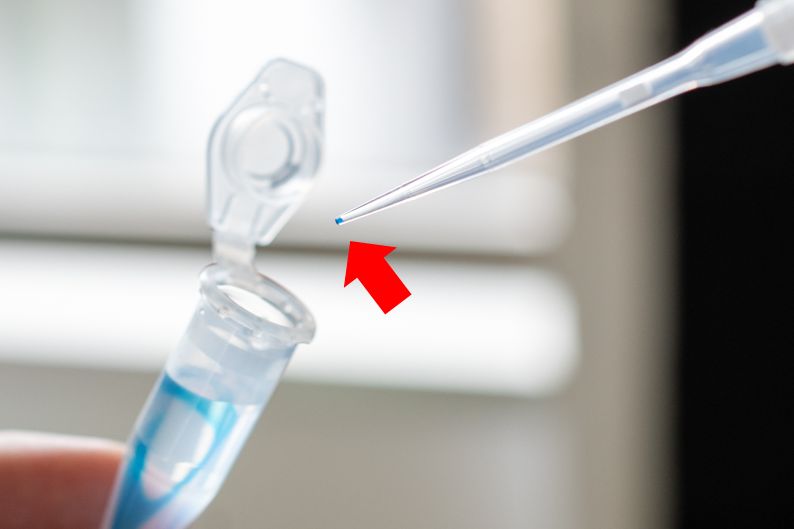
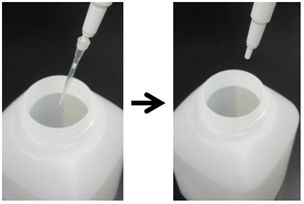
6-1 Raise the container which you want to dispense until the position you can see it clearly and place the tip against the wall of the container
point: Focus on the destination
Dispensing container (e.g., microtubes) should be lifted to a position where you can see it well as possible. A visual check will make it easier to notice if something is wrong.
point: Beware of splashing
When dispensing, try to let the liquid run along the wall of the container to avoid splashing.
6-2 Dispense the liquid completely
point: Is there anything left on the tip?
Even if you push the push button down to the 1st stop to release the liquid, a small amount may remain in the tip. You can use the 2nd stop to push the last drop of liquid out of the tip. Pressing to the 1st stop will push out the amount of liquid matched on the scale, and pressing to the 2nd stop will push out a little more from the set amount, allowing you to push out the remaining amount in the tip.
6-3 When mixing liquid to liquid, mix them well
point: Is the solution completely mixed?
When mixing two liquids, just pushing out the liquids is not enough to mix them together. For example, have you ever had an experience with a tea with sugar that tasted too strong at the bottom because you did not mix it enough? On genetic testing, if the concentration of the mixed solution is non-uniform, the reaction will not proceed as expected and may cause failure, so be sure to mix the solution after dispensing. By repeatedly aspirating and dispensing the liquid with a micropipette can also mix the liquid. This is called pipetting. In addition to pipetting, there are other mixing methods such as agitation with equipment (vortex mixer), tapping, and inverted mixing. As solutions containing proteins, such as enzymes, are particularly prone to foaming; therefore, gentle mixing methods (pipetting or inverted mixing) are suitable.
See gif; Tapping (opens in a new window)
See gif; Inverted mixing (opens in a new window)
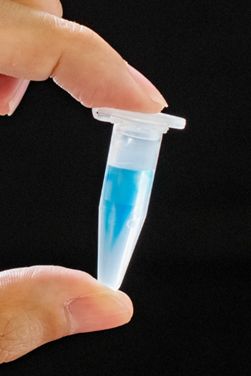
point: Beware of liquid remaining on the lid
If the solution gets on the lid after mixing, drop it with a swing of the wrist or tap the bottom with a thump. If you have a small centrifuge, please use it to spin down the liquid. If the liquid is left on the lid, it can easily get on your fingertips when you open it and become contaminated.

6-4 Remove the installed tip
caution: About removing the tip
If tip with the solution on the tip come in contact with a desk or tip case, it may contaminate the testing environment, so remove immediately after use. When the ejector button is used to remove the tip after use, it may come off with great force and bounce off the wall of the waste container. Be careful not to let the released tip jump out of the waste container to keep the testing environment clean. Pack up the removed tips in a bag or other container and dispose of them according to the disposal methods set by your local government.
point: About continuous dispensing
If the same solution was dispensed into different containers in succession, the same tip can be used. In this case, the liquid should be dispensed without touching the container to prevent the tip from getting dirty and affecting the next dispensing.
7 Storage and Maintenance
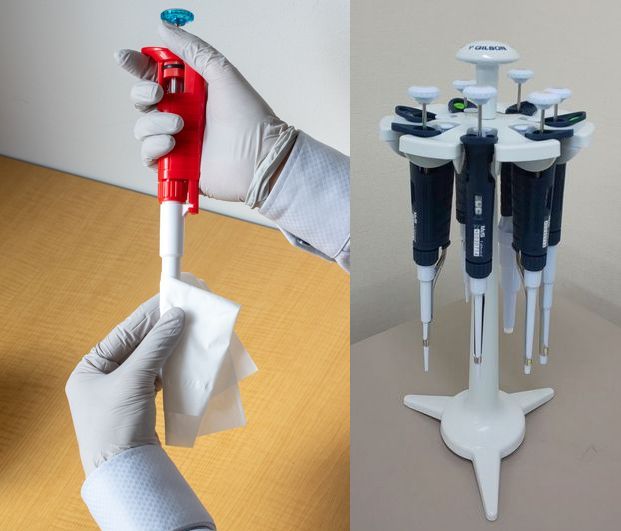
Store your micropipette in a clean environment after using it. The most important part of the micropipette is the apical of tip holder where the tip is attached. If tip holder is not clean, for example, contamination may spread by unintentional contact of the contaminated part to a container which it is dispensed. Wipe it down with a cloth moistened with 70% ethanol or a commercial alcohol-containing tissue before returning it to the storage area. If you have a pipette stand, hang the micropipette on it, or if you do not have one, put it in an appropriate box.
point: When you use the micropipette next time
Before you start using micropipette, aspirate water into the tip and stop it in the air for about 10-20 seconds to see if the liquid leaks. If you observe leaking, it will need to be repaired.
point: Periodic calibration is desired
After a long period of use, there may be a slight discrepancy between the set amount of liquid to be aspirated and the actual amount of liquid to be aspirated due to deterioration of the O-ring. Since such misalignments are difficult to notice, it is better to ask the manufacturer to inspect them periodically. This process of checking the amount of liquid in the setting and the actual amount is called calibration.
8 Conclusion
That is all about the basic manipulation to use the micropipette. How was that? You may not be able to handle it well at first, but you will get used to it. If you forget how to use it or get lost, please read this article again. We hope this will help you to use your micropipette correctly.
特集バナー


External link
External link